Learn the simple tricks to nailing the most spectacular crispy, charred steak crust using your grill.
Cooking steak is intimidating. Most of us strive for a perfect medium rare, but we also want that incredible crispy, crust, perfectly charred outer crust. It seems counterintuitive that you can have one without the other. To get the crust, the steak might overcook. But to keep it the exact doneness you want, often the crust won’t form. So, a lot of folks just throw their hands up and say ‘too hard’, or settle of second best. I’m here to say: don’t settle! Getting a phenomenal crust on your steak while keeping it perfectly medium rare IS possible, and even easy once you know how.
The essential tools for the perfect steak crust on a grill:
There are basically three essentials here. First, the meat itself. The steak needs to be at least one inch thick for this to work. Even better if you can get it thicker, 1.5″ is my ideal size. Try to buy the best quality meat you can afford – the more marbling (those tiny seams of fat inside the steak) the steak has, the better the final taste will be both in flavor and tenderness. The second essential is how you configure or set up your grill. You will need to use a two-zone setup for your grill, which basically means you are creating a hotter and cooler side. You can see the full how-to on setting up a two zone grill here. I recommend using charcoal over gas (I use Kingsford original briquettes) because it really does make a difference to the finished flavor. Thirdly, you absolutely must have a meat thermometer to check the internal temperature. Invest in a quality one like this Thermapen, you will use it for SO many meals to come.
You are watching: How to get the perfect steak crust on a grilled ribeye
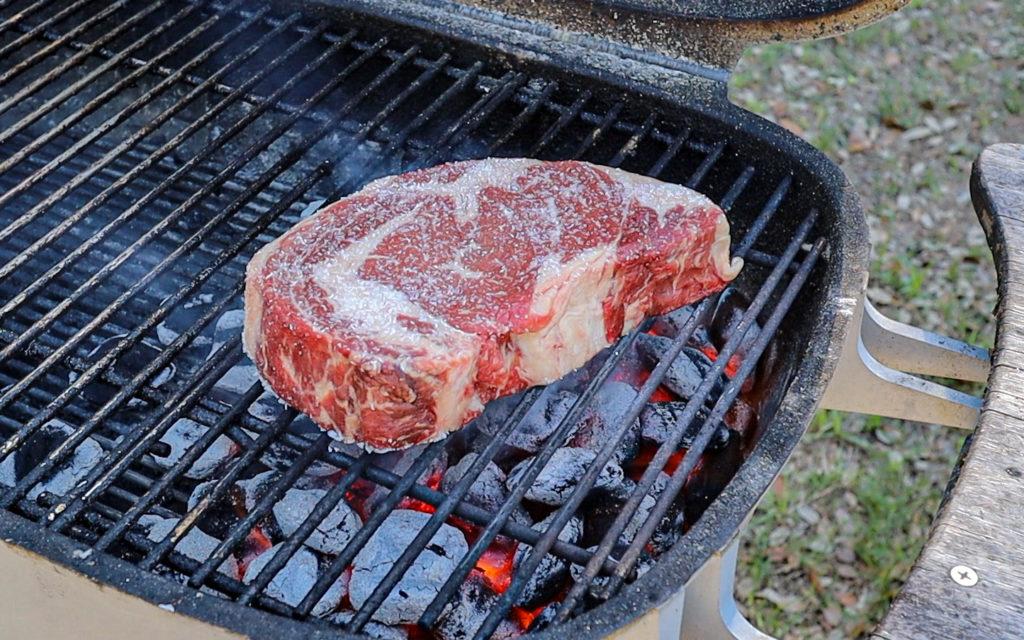
Set up your grill and pat dry your steak.
Follow the instructions linked above to create a two zone grill. The grill should be nice and hot, running over 400f. Pat your steak dry with a paper towel, then sprinkle a generous amount of kosher salt on both sides of the steak. Then, place it over the hot side of your grill to start cooking.
Flip your steak often and frequently.
Turn the steak every 45 seconds or so, until you have built up a nice starting color and the fat has started to render. On your first flip, the steak will look underwhelmingly pale. Don’t worry, this is normal. Stick with it because you’re on your way to the perfect crust! The total time to build the base color will be about 5 minutes (remember, you are flipping constantly during this initial time).

Start to use the cool side of the grill.
See more : Start your wellness journey today!
Once you have achieved the nice starting color, move your steak across to the cool side of the grill away from the coals. Here, the steak will continue to cook over much more gentle heat. This is how we get perfect doneness without over or under doing the outside!

Use temperature to check for the perfect steak doneness.
This is where your thermometer becomes the rock star. You leave your steak on this indirect or cool side until you reach your desired temperature. The temps I provide here are a little below the normal doneness temps, but since we’re going to go back to the hot side, I’d rather be under than over done! Here are the temps you need to look for:
- RARE – 118f
- MEDIUM RARE – 125f
- MEDIUM – 135f
If you like your steak well done, you can actually skip this entire two zone thing. Just keep flipping over the direct heat until your steak registers at least 150f internal temperature.

Time to bring in the butter!
Once your steak is at your desired temperature, brush it with a generous amount of melted butter. This is the key to the final crust. Not only will the butter help with the magical char, but it will also taste AMAZING. If you’re looking to keep this dairy free, brush the steak with melted beef tallow (fat) instead.

Time for the final epic sear to get that perfect steak crust
Place the steak BACK over the coals, butter side down. While it’s cooking, brush the other side with butter. Flip the steak every 15-20 seconds, and be careful – there’s a lot of fat making those flames flare, and your steak can go from crusted to burnt really quickly. All in all, I usually do three coats of butter/sear per side.

A quick rest before enjoying steak perfection
Once you have your crust, rest your steak for a couple of minutes before cutting into it. This will help keep it max juicy!
Keep scrolling for my written recipe. But first here’s a bonus video version:
Source: https://en.congthucvatly.com
Category: Cook